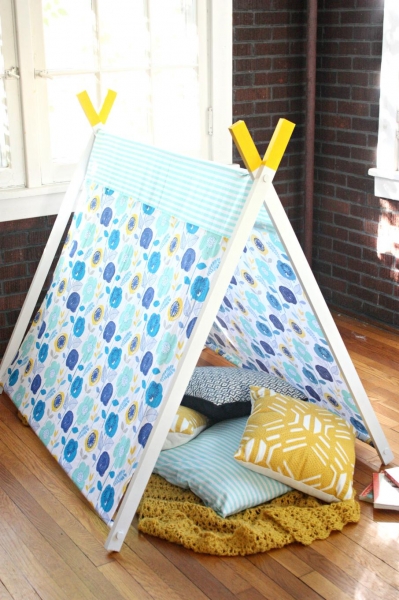
In any children’s store sells playhouses, they can be made of fabric, plastic or even wood. But in any case for such a toy you have to shell out a tidy sum. If you want to please your toddler, kids tent can be make your own hands.
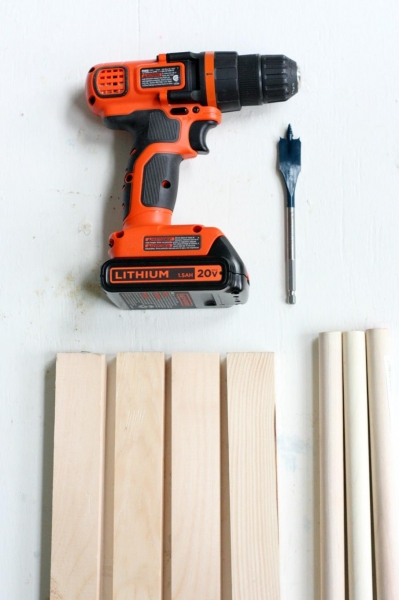
Materials and tools for the frame:
- wooden poles with a diameter of about 18 mm, length 1200 mm (3 pieces)
- Reiki 25×50 mm, length of 1200 mm (4 pieces)
- drill pen drill with a diameter of 18 mm
- paint and paint brush
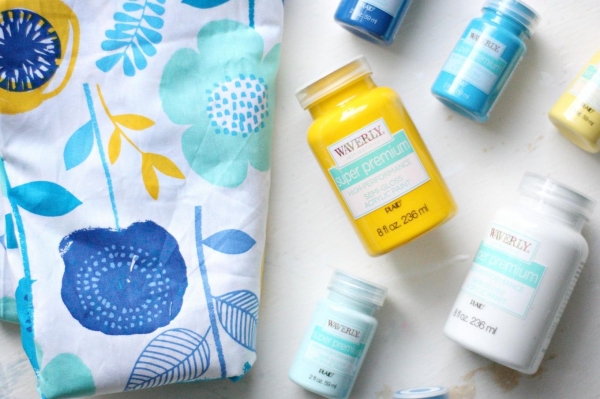
Materials and tools for awning:
- fabric matching colour 2100×1280 mm
- sewing machine
- glue gun
How to make a tent with their hands
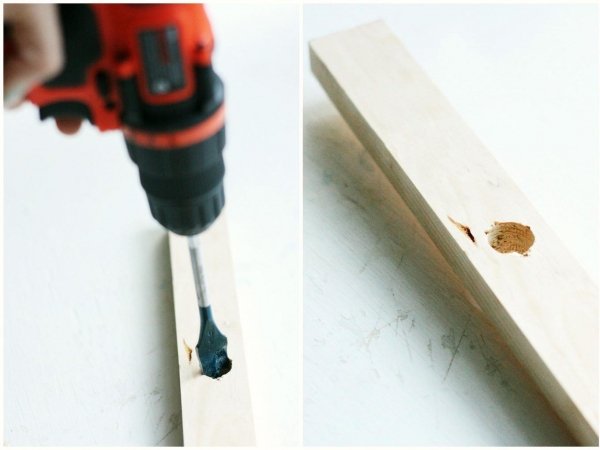
From the edge of each Reiki retreat at 150 mm In the marked points, drill holes with a diameter of 18 mm.
From the opposite edge of each Reiki retreat about 40 mm, and drill the hole with a diameter of 18 mm.
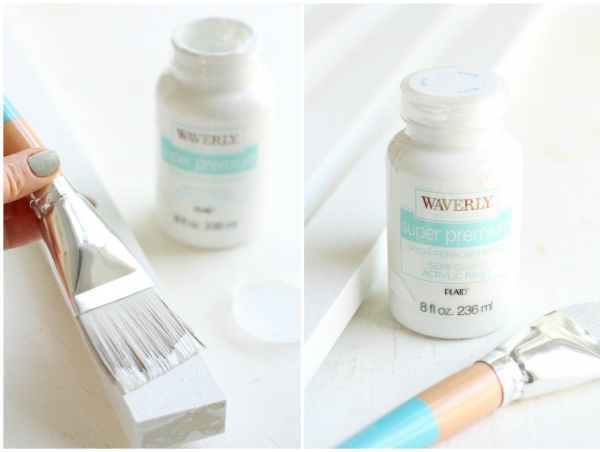
Now you can start painting. Paint all the rails and poles with white paint. Let the paint dry.
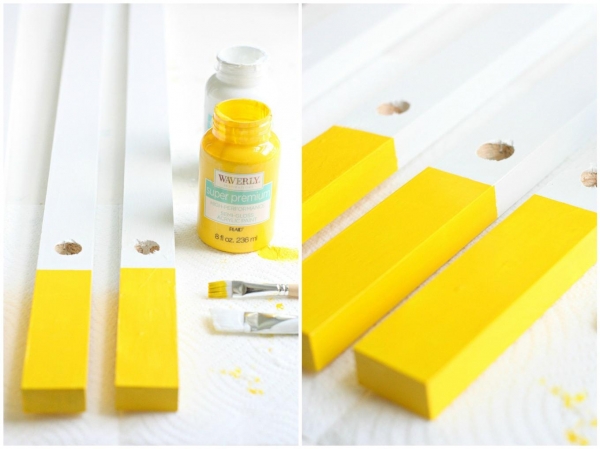
Using masking tape, paint the ends of the rails a bright color. Remove the duct tape.
Cut the fabric into two sections with dimensions 850×1280 mm. So you still have allowances for bending about 50 mm.
With a sewing machine, connect the two pieces of fabric, inserting a wedge between them fabric different colors. This is not necessary, but the tent will look original.
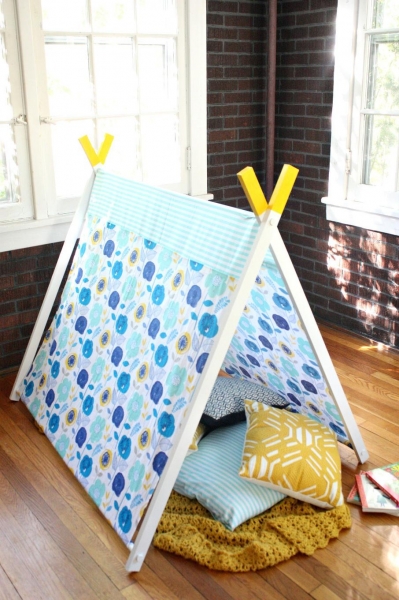
Take two strips and fold them so the top holes match. Into the holes and insert the wooden pole. The rail must enter a fairly tightly. On the other side of the pole, put on another pair of rails. On the frame pull the tent.
Insert the wooden pole into the bottom holes in the slats. Using hot glue attach to these poles the edge of the awning, make sure that the fabric has been uniformly stretched.
Allow the glue to cool. Lovely game tent ready.