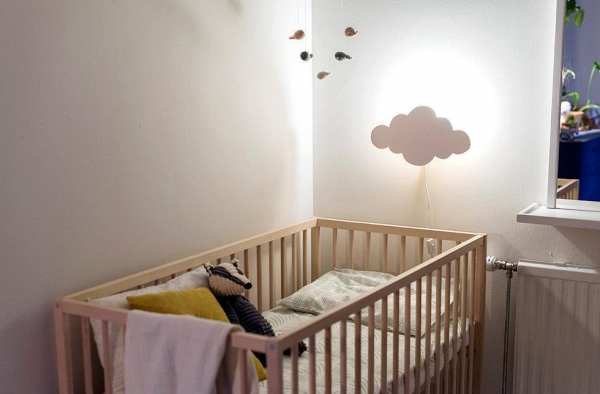
In the children’s room in addition to the main lighting should be even and additional. At night you can use not very bright nochnichok that will not Wake your baby, and allowing you to navigate around the room. Yes, and some kids can’t sleep without light. In any case, night light or lamp in the nursery — a thing irreplaceable.
In this article we will explain how to make an original lamp in the nursery with their hands.
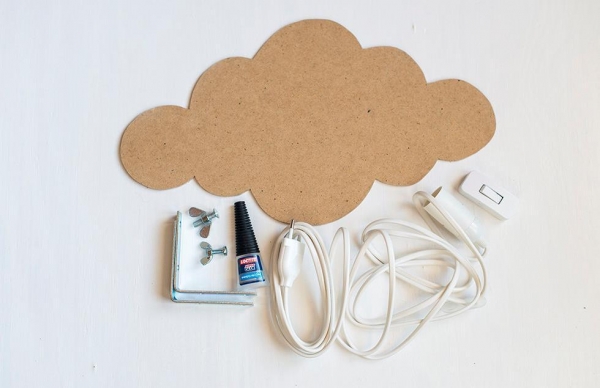
Materials and tools for the manufacture of lamp:
- a small sheet of thin MDF
- two metal corner bracket
- the socket with cable and plug
- a few bolts with nuts
- a bracket for mounting the cartridge
- Thermopylae
- paper for making pattern
- scissors
- jig saw
- white non-toxic paint

How to make a children’s wall lamp with your hands
On a large sheet of paper, draw a cloud.
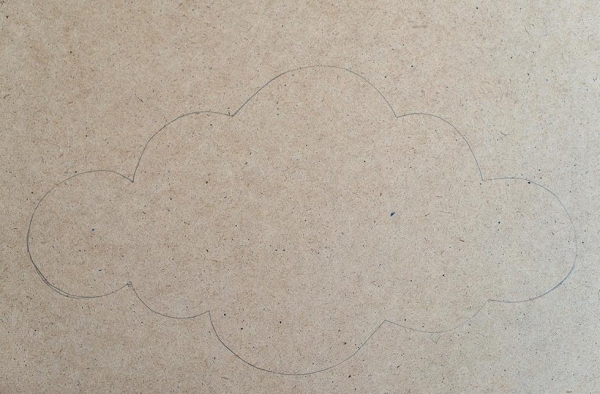
The image using the pattern transfer onto the sheet of chipboard.
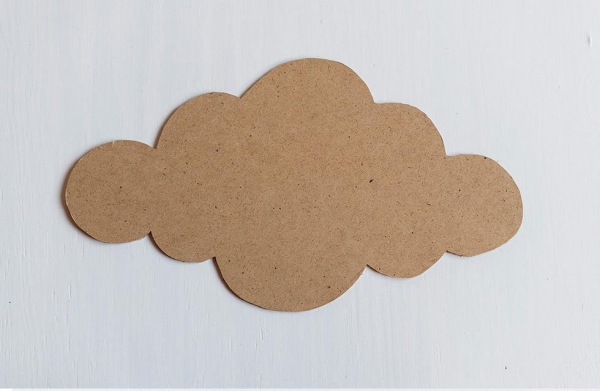
Saw on a marking jig saw or cut with a sharp knife.
Color the cloud in white.
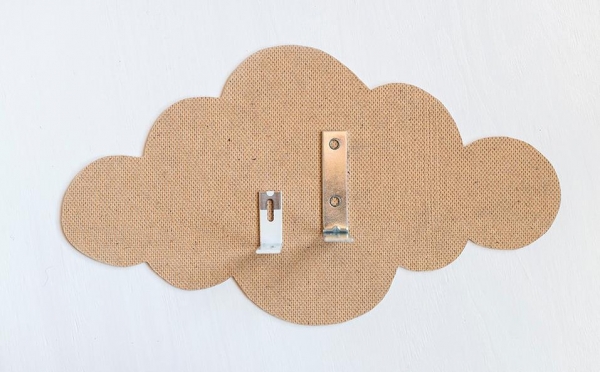
To the rear surface of the clouds glue two brackets, one to lock the cartridge, and the second for mounting on the wall.
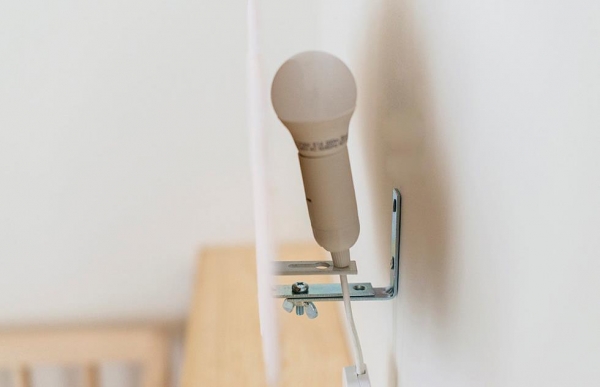
Lock the cartridge with the cable, screw in the light bulb.
Note: in children it is better to use led lamps since they do not heat up after prolonged use.
On the wall with anchors or screws fix another bracket. On it hang the cloud.
Connect the lamp to the network.
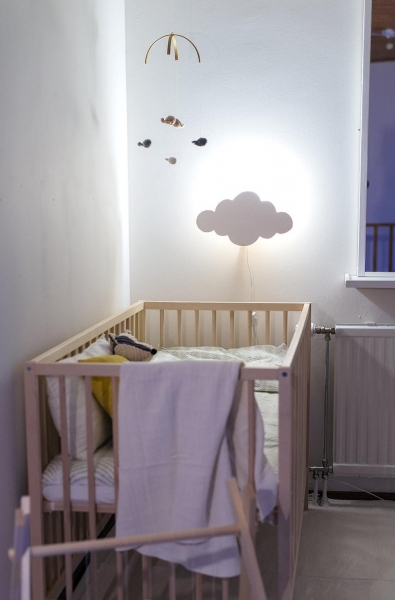
On the wall will be a bright spot of light resembling the sun. And our cloud it a bit close, so it is not so much shone in the eyes of the baby.