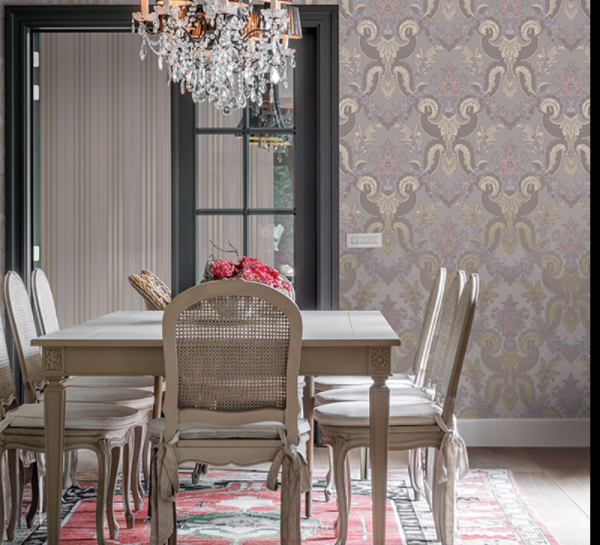
How to glue vinyl Wallpaper on non-woven basis?! For once in your life, but you are faced with this question. And it’s not that “Wallpaper” is perceived as a common thing, and that vinyl Wallpaper is quite different in nature and appearance decorations for our walls.
Vinyl is plastic and at the same time, dense material. Gloss, density and texture in one person, such as the skin coats the walls. And it is important that this “skin” is formed without defects, properly put the Wallpaper according to the geometry of the walls, you must agree wall with the broken level is not rare.
You will need:
- brush on primer;
- brush for applying glue to the Wallpaper;
- a ruler and a level;
- cushion to secure the seams and joints;
- a dry towel or plastic spatula for smoothing;
- an x-ACTO knife for trimming.
So, the process is divided into stages.
Step one: preparing the walls
The wall must be prepared.To remove all remnants of previous Wallpaper, putty if on the walls there are cracks or sokoli. Brush apply a primer of deep penetration in walls — it is necessary to avoid the appearance of mold under the Wallpaper. To be absolutely sure of the dryness of the walls before the big moment, on the wall you can stick tape a small piece of plastic, if for a night on the polyethylene appears droplets of water, so the wall is not sufficiently dry. And you have to wait another day. There is another way to check whether the finished wall to the gluing of the Wallpaper — just stick a piece of tape on the wall, and abruptly it clear if the tape was left pieces of plaster, the wall still is not ready for further procedure. You can open the Windows to reduce humidity and increase air circulation.
The second stage
On the wall you need from the right angle to measure the level of vertical line and mark with a pencil where you will glue down the first strip of fabric. Of course, if you believe in the correct geometry of the walls and corners, this item can be ignored.
Step three: prepare the Wallpaper paintings
Measure the height of the wall, make allowance for 7-10 cm on top and bottom, extra still cut, but it certainly will be able to bridge the gap between drawing and to prevent the curvature of the lines on the ceiling. Fold the Wallpaper canvas face down, one on one, previously controlled by the top coincides with the top of the other canvases. Fold the stack with the maximum of 10 lanes, with the displacement of the upper to the lower 10-15 cm, which would avoid confusion and not to take just two paintings.
Step four: glue the first leaf
So, the process of bonding is simple with modern clausii compositions. You can choose a specially designed adhesive for vinyl Wallpaper on non-woven with colored pigment, so that you when applied accurately will be able to assess with the naked eye by the color of the composition is evenly applied or not, the glue on the wall and the canvas.
Previously under the sheet, apply the adhesive on the wall, and then, while the glue is absorbed into the plaster wall, apply glue to the very leaf Wallpaper. It is important, when working with vinyl Wallpaper, because they themselves have a spongy structure, the adhesive in this case will firmly hold the canvas to the wall.
Of course the procedure itself bonding involves the presence of an assistant who puts the painting from the ladder or chair. But if you are gluing on their own, then two edges with adhesive, must be applied to the center of the canvas. Taking and pulling off one edge, you pick up from the floor, prepared the piece, a chair or ladder start to attach the canvas focusing on pre-marked with a vertical line and through the ceiling. Attach to the wall, a little push, and then you can begin peeling off the bottom of the blade , which would connect lower part.
Now you’ll need a dry towel, which you gently smooth out all the bumps. Making sure the fabric is tight to the wall, take a plastic putty knife with slight pressure from the top down and from the center vertical to the edges push out excess glue clots.
Step five: trim the edges
Now when one strip is glued, you should not miss the point, yet not dried out fabric — trim excess edges. Material a little moist, trim will simply attaching a line to the plinth with an overlap of 5-6 mm and trim excess with a utility knife.
Step six: glue non-woven Wallpaper in “difficult” places
In any case, the wall is always going to have a tough zones (designated under the socket, corners, window sills, radiators)
It is important not to be afraid, and to include these nodes.
Gluing, given the characteristics of the infrastructure of the walls, in the corners with notches behind the radiator, using a narrow roller, smoothing tightly to the wall, but if you have a lot of outlets and switches, you must disconnect the room, and the pre-cut holes don’t need later when the Wallpaper dries, the hole is easily palpable and are cut with a utility knife. And switches and sockets are screwed back into place.
I think the great advantage of vinyl Wallpapers on non-woven basis, this process of dismantling..enough of them to wet and they easy piece behind the walls.
So if your choice fell on these Wallpapers, I’m sure you will be pleased with how the process of gluing, operation, and subsequent demontazhem. While vinyl Wallpaper is durable enough and do not lose their color, texture and freshness for 5-8 years.